-
Open the signed message details
Open the email and click on the orange signature icon in the message header to bring up Outlook's security details.
-
Verify the certificate and sender identity
In the details panel, confirm that Outlook reports a valid digital signature and that the certificate belongs to the sender you expect.
Email signature verification
How to verify an S/MIME signature
If you received a digitally signed email, your mail app should indicate that the message is signed. Use the client-specific steps below to confirm the signature is valid and inspect the certificate details.
Choose your email client
Select the app you use to see what to look for.
-
Click the signature symbol in the top right
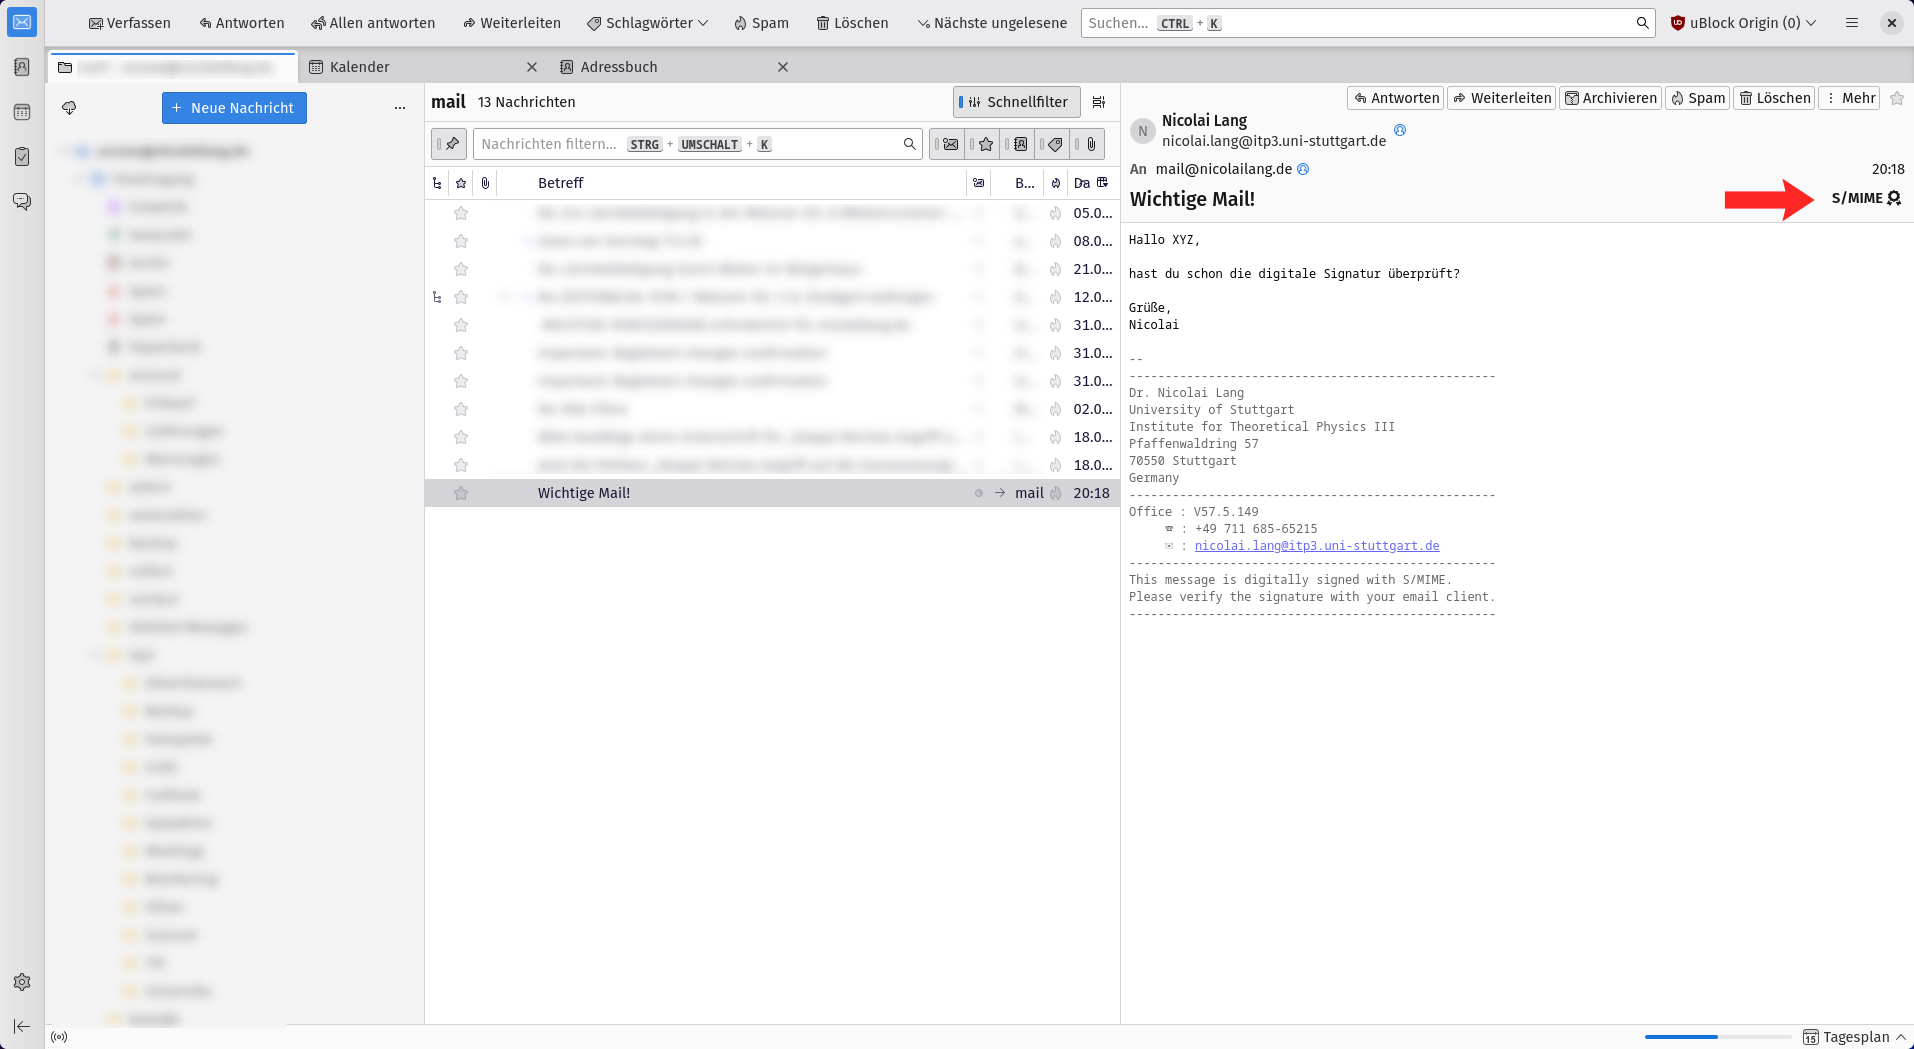
Open the email and click the small S/MIME signature icon next to the message time in the upper-right corner.
-
Check the full sender name in the popup
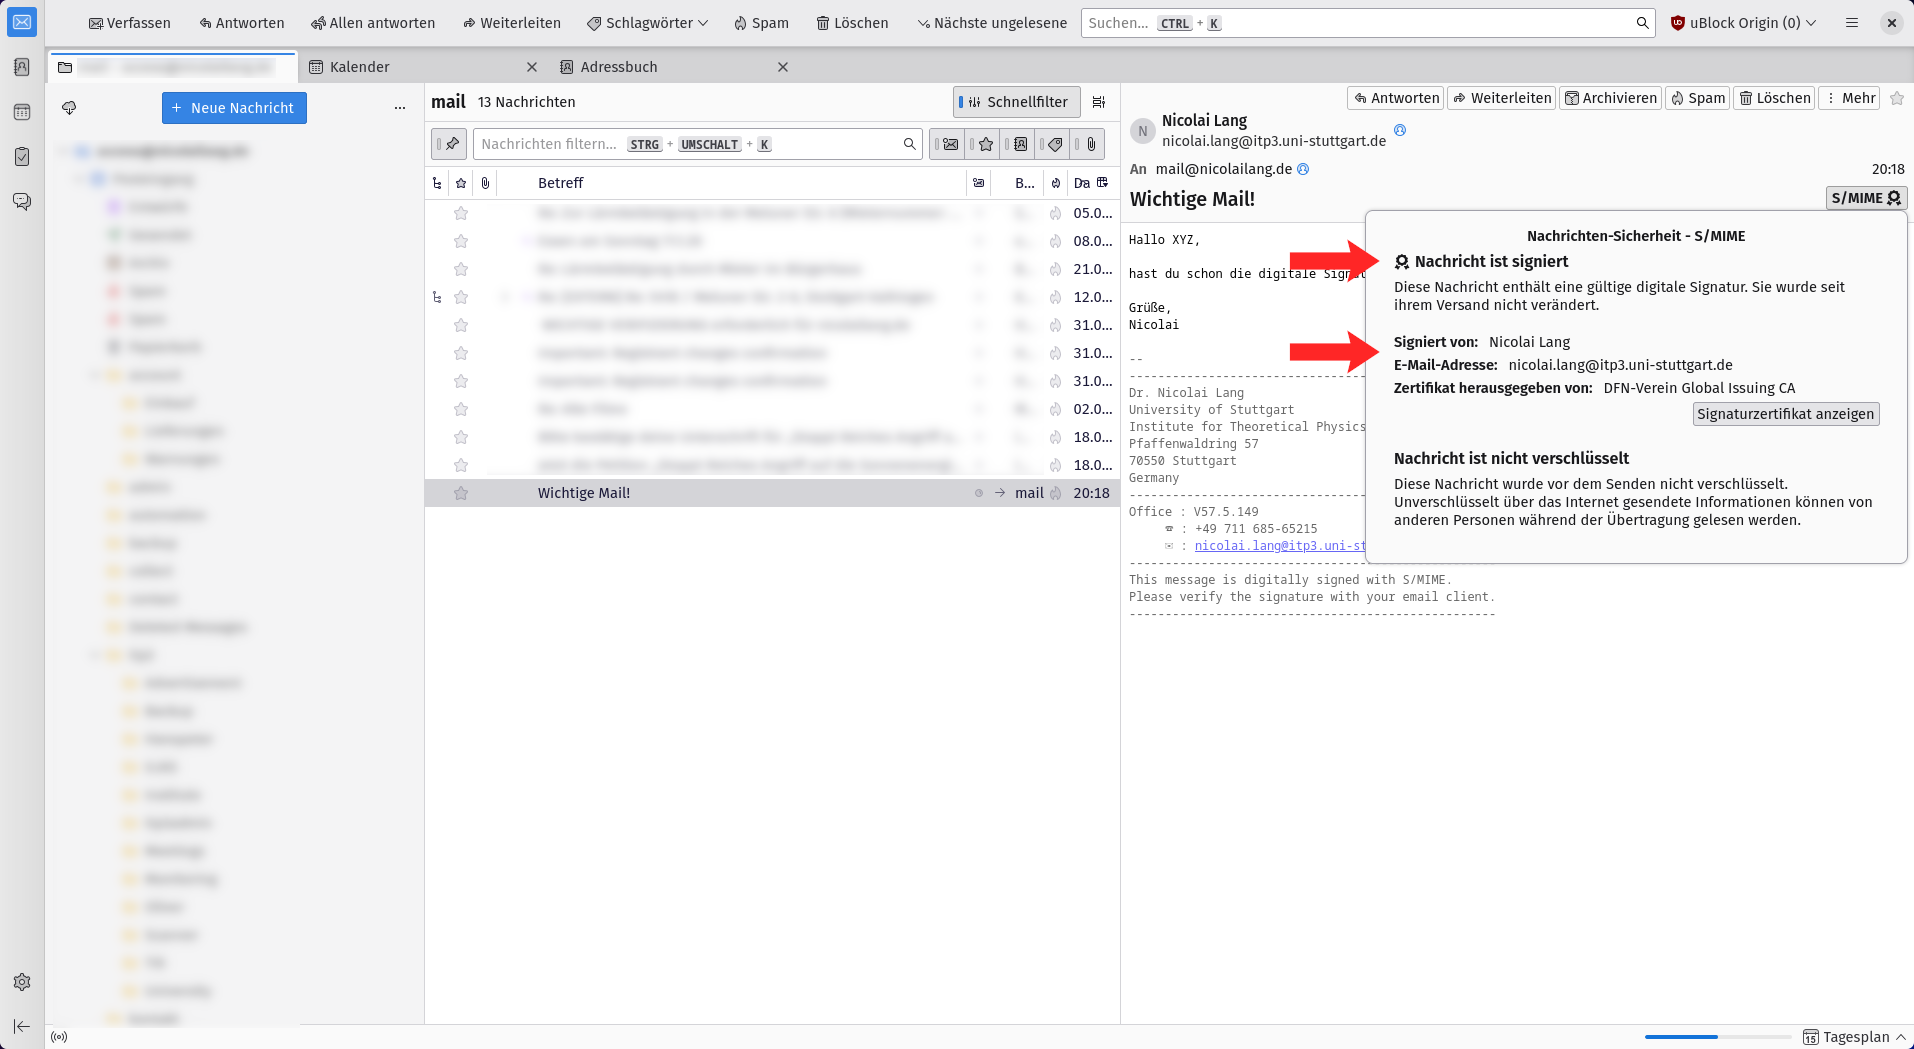
Thunderbird will open a security popup. Verify that the message is signed and that the full sender name is the expected one.
-
Open the message details
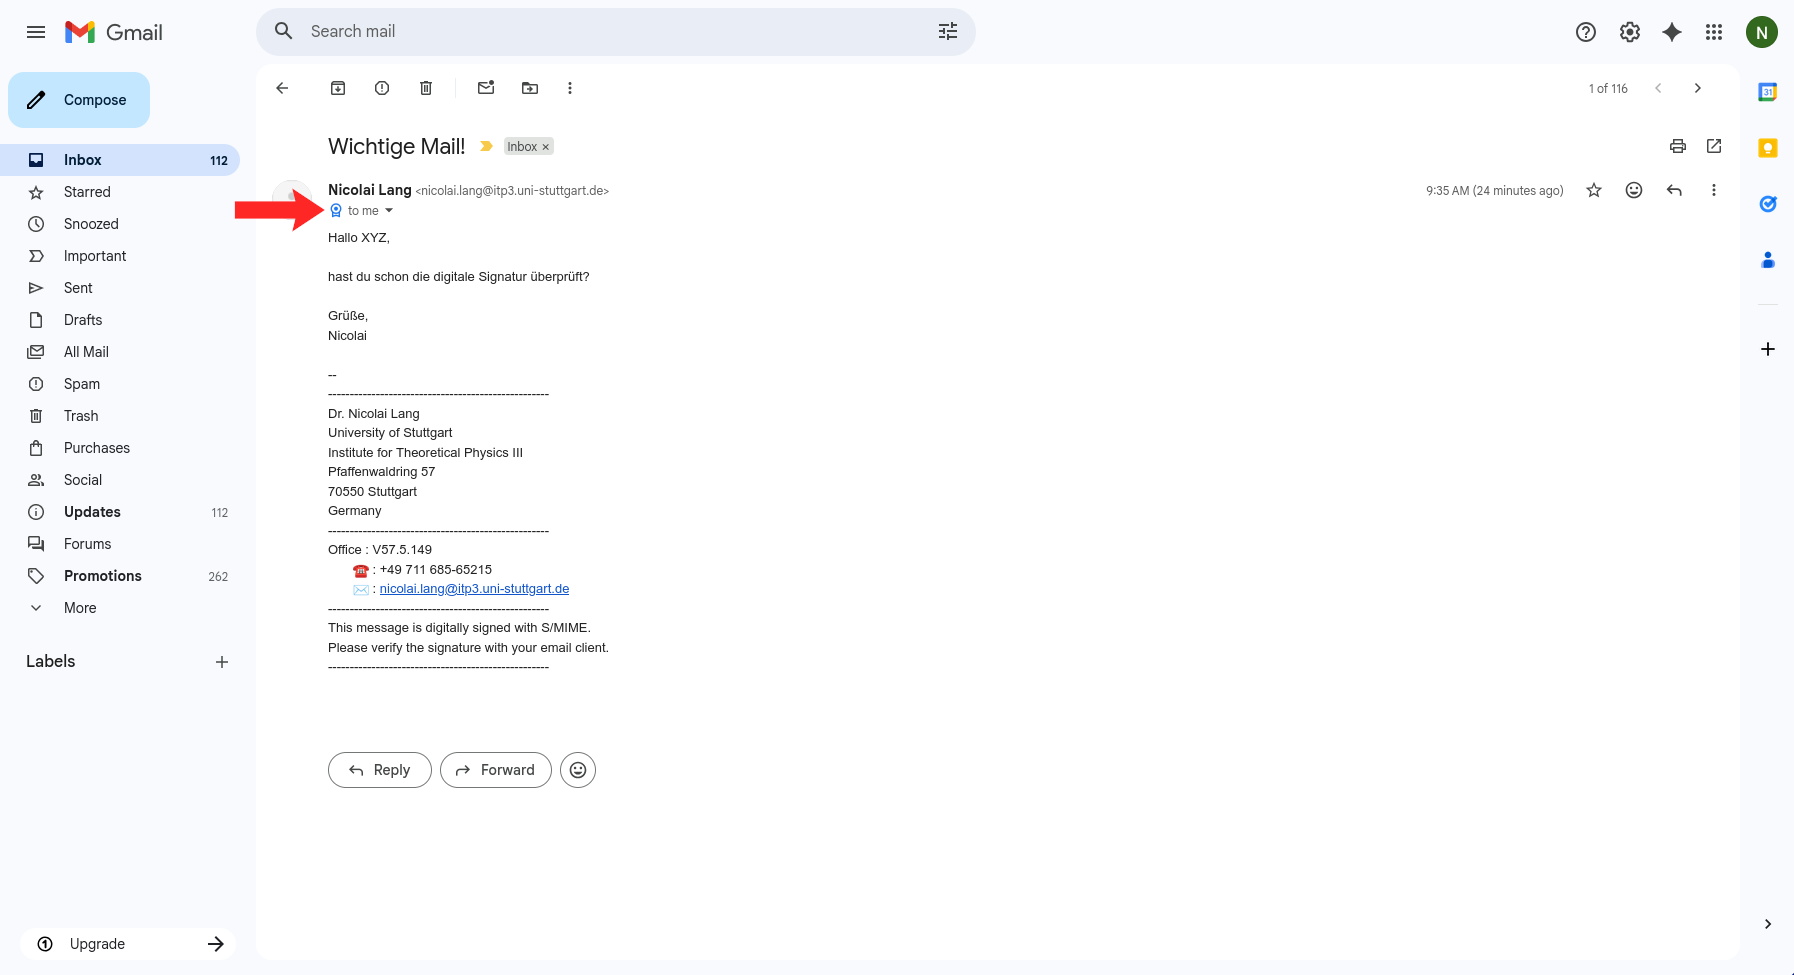
Open the email and click the small dropdown in the message header so Gmail shows the full sender and delivery details.
-
Check that Gmail marks the message as signed
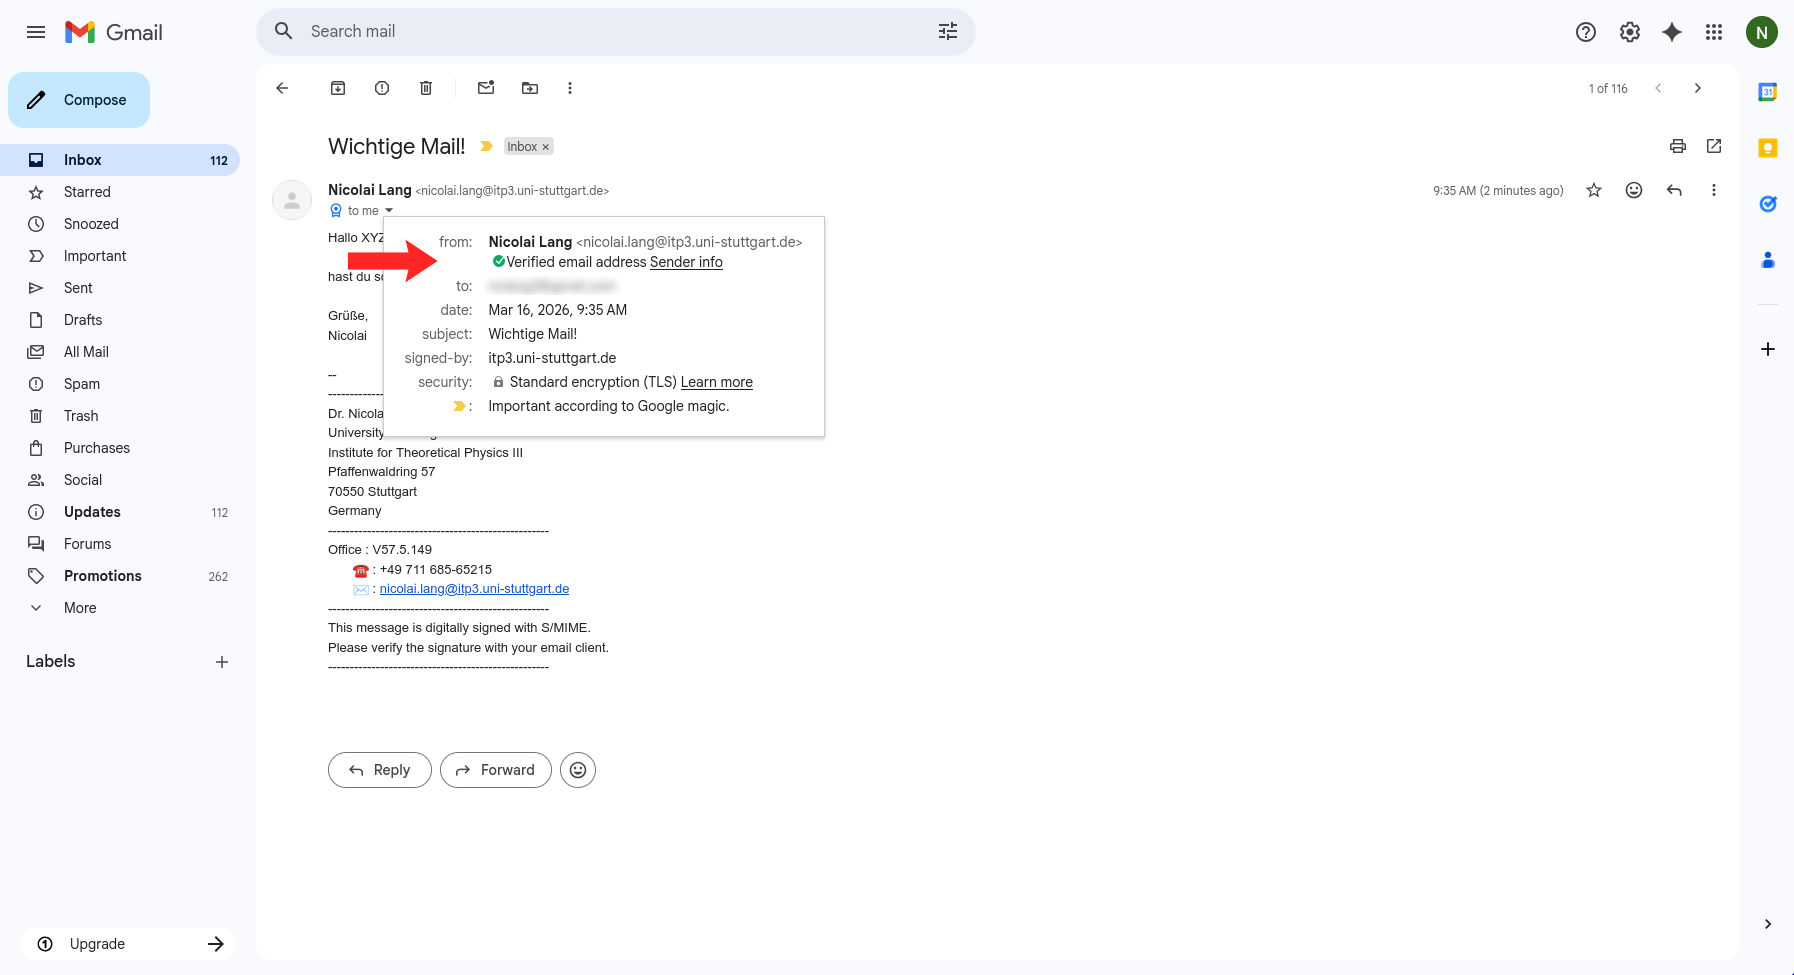
In the expanded details, check the verification status (green checkmark) and click on "Sender info".
-
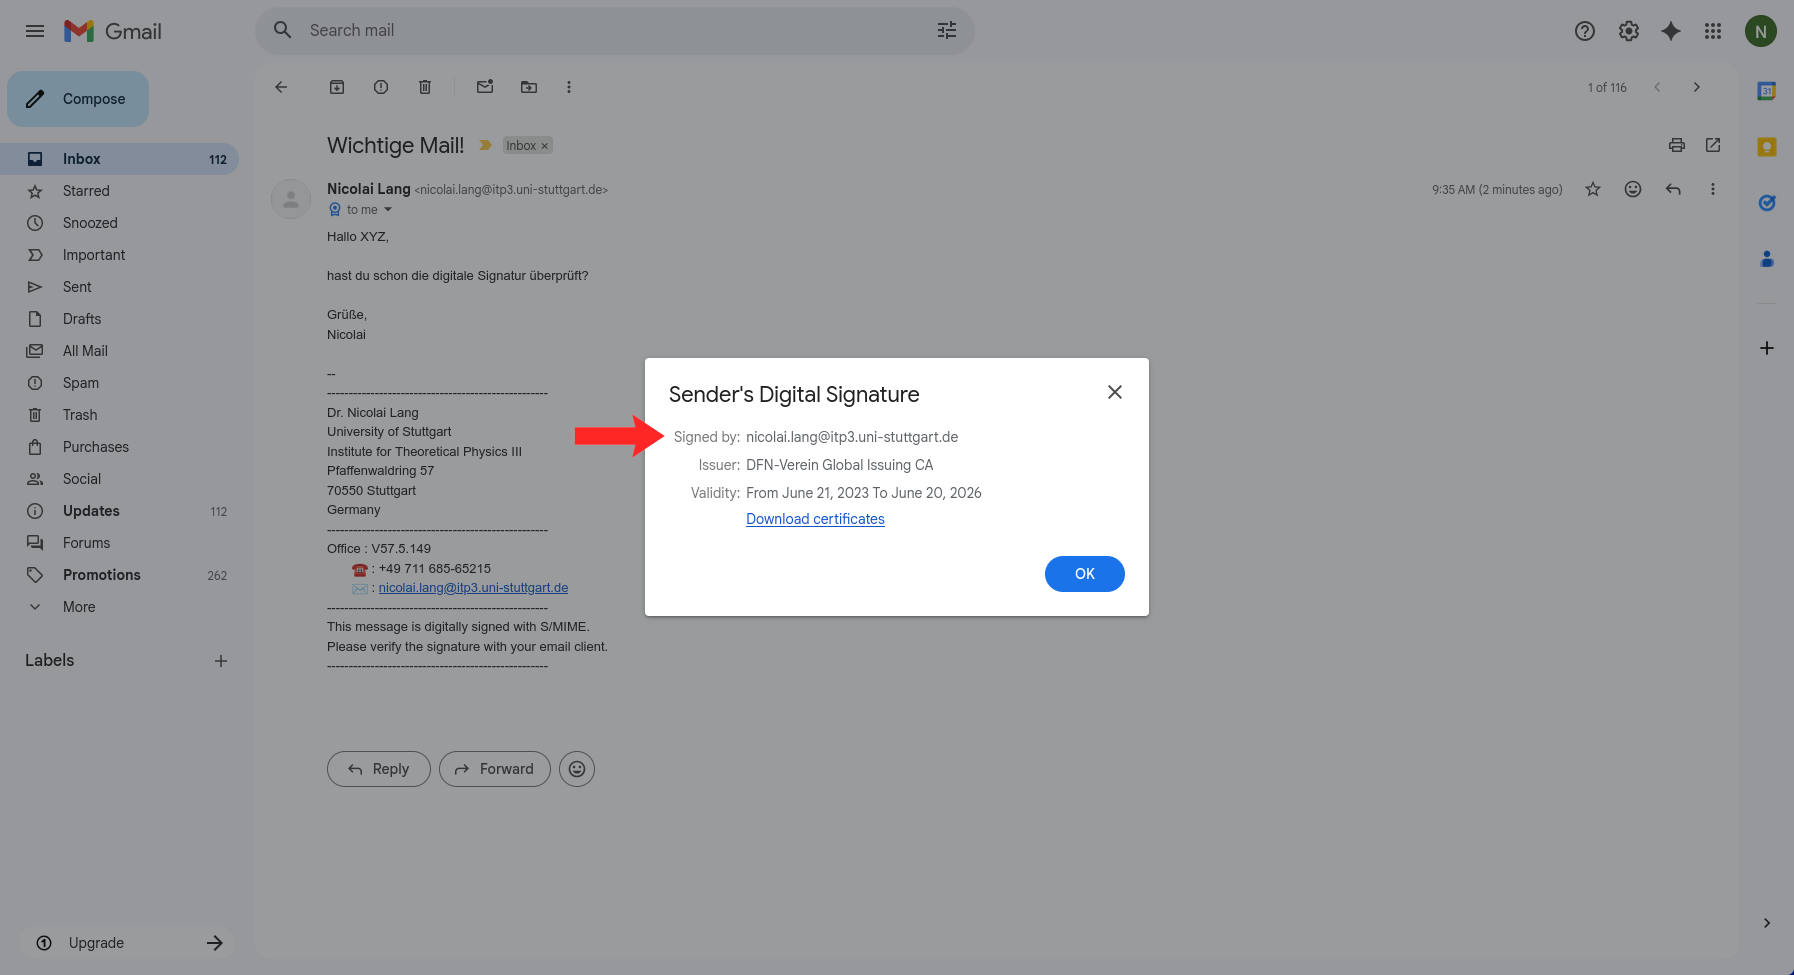
Open the certificate details and verify the sender
Check that the certificate identity matches the sender you expect.
-
Find the signed sender indicator in the header
Open the message and look below the sender name for the signed indicator next to the sender address.
-
Click the signed indicator to open signature details
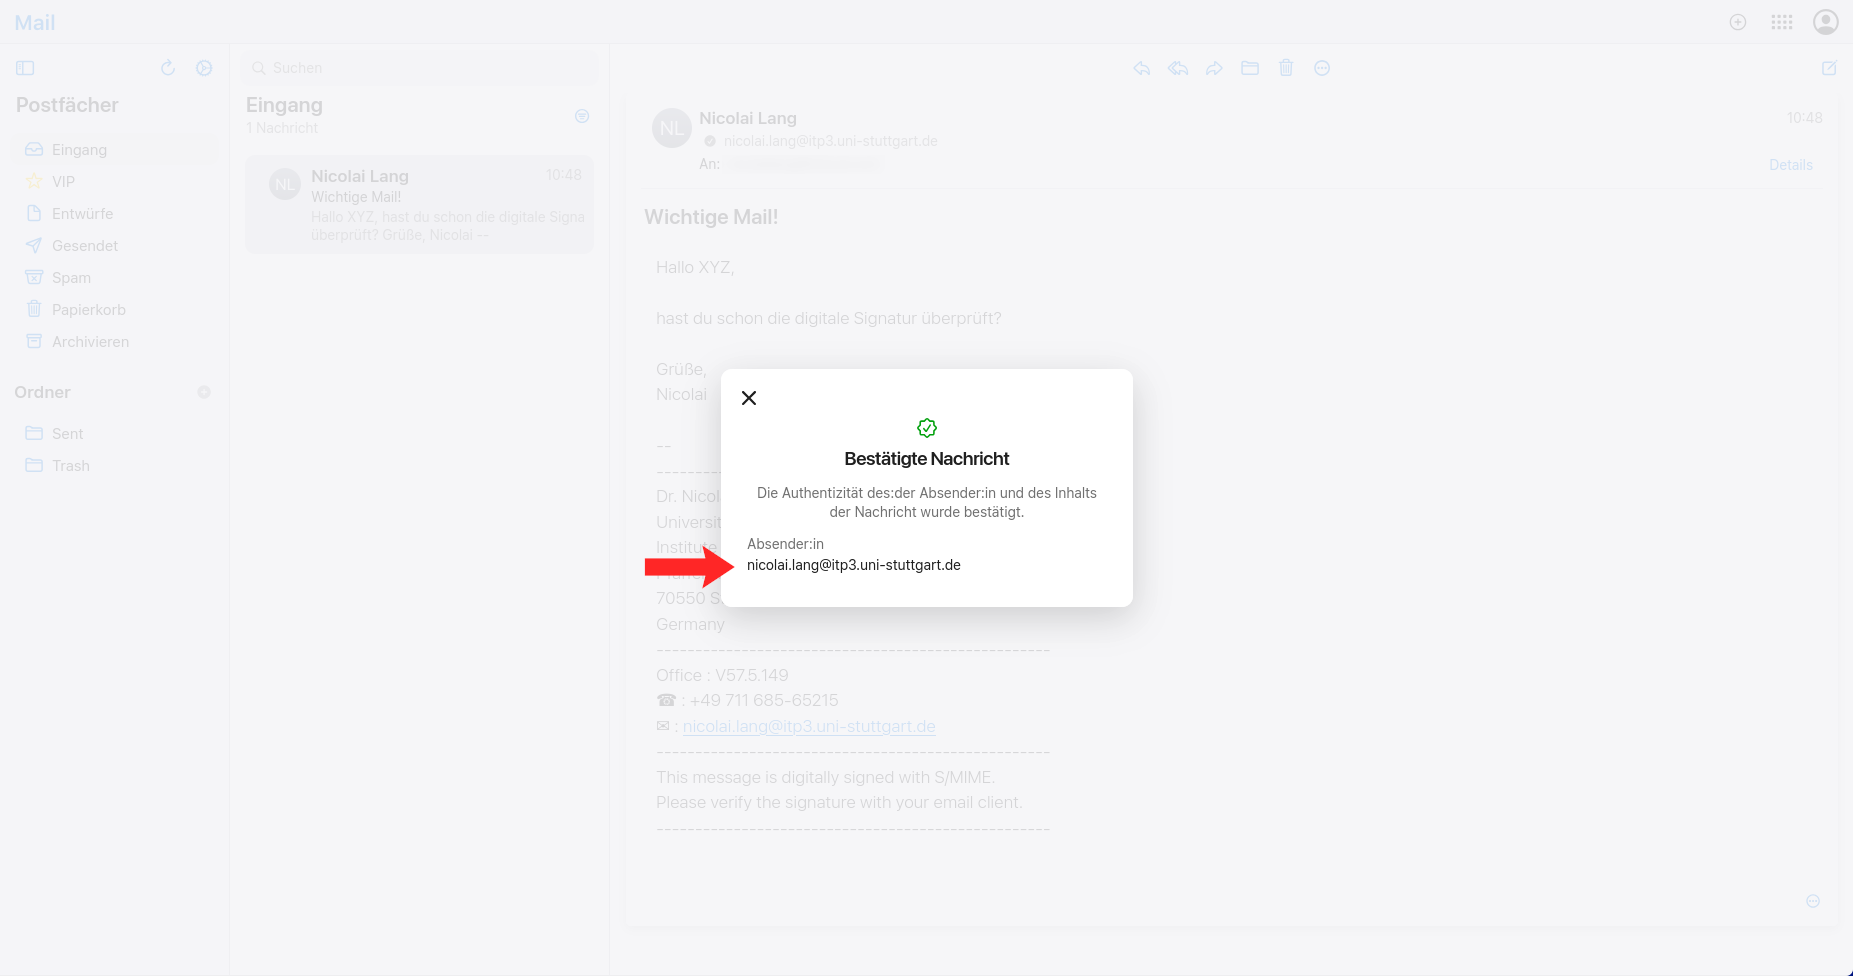
Select the signed sender badge and choose Show Details to open Apple Mail's signature information popup.
-
Confirm the authenticated sender address
In the confirmation window, verify that Apple Mail marks the message as authenticated and that the sender address matches the person you expect.
Using another email client?
Look for wording such as digitally signed, signature is valid, or a certificate viewer linked from the message header. If your client exposes certificate details, confirm that the signer identity matches the expected sender address and that the certificate chain is trusted.